

290 |
POWER EXCEL WITH MR EXCEL |
|
|
4.Highlight columns A and B. Press Ctrl+C to copy. Choose Home, Paste dropdown, Paste Values to convert the formulas to values. You do this to remove the customer heading rows. As you think about a method to isolate the heading rows, you will notice that heading rows are the only rows with blank cells in column D. You can move the blanks to the end of a data set by sorting the data by column D.
5.Select the heading in D1. Select Data, AZ to sort ascending by date. Any rows that have no value in column D will automatically sort to the bottom of the data set.
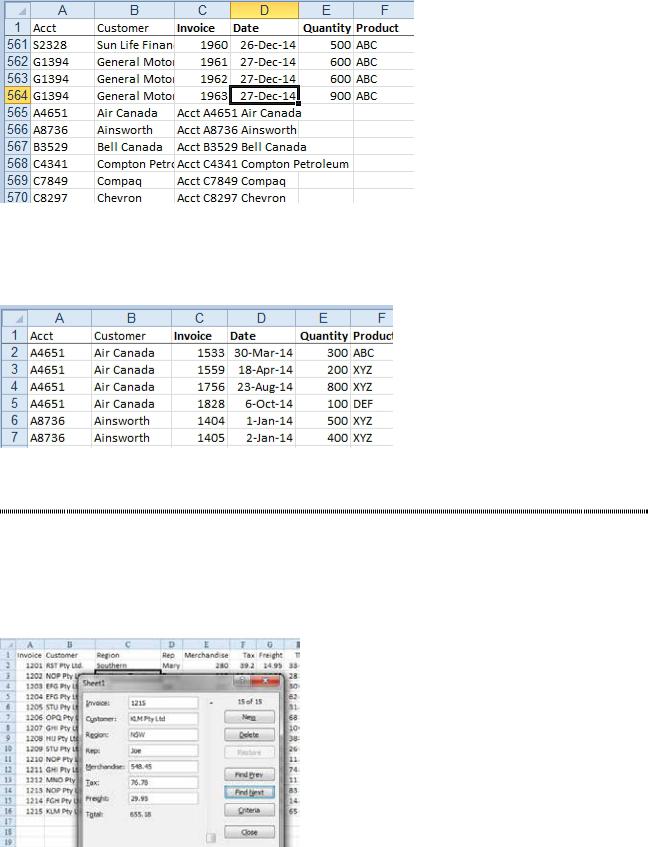
Figure 743 The extraneous heading rows sort to the bottom.
6. With the cell pointer in D1, press the End key and then the Down Arrow key twice. The cell pointer will be located on the first customer heading. Delete all the rows below row 564.
Results: You have a clean data set with customer information on every row. You can sort this data and otherwise use it for data analysis.
Figure 744 Customer data has been added to each record.
USE A BUILT-IN DATA ENTRY FORM
Problem: I need to do data entry in Excel. I have a lot of records to key or to edit. Can I easily create a dialog to help with this?
Strategy: By using Excel VBA, you can build very complex dialog boxes for data entry. However, even without knowing VBA, you can use a simple built-in dialog for entering data:
1. Select a cell in your data. Press Alt+D then O (letter O). Excel will display a dialog box with your fields. Click the Find Next and Find Prev buttons to move through the data set.
Figure 745 The built-in data entry form.
PART 3: WRANGLING DATA |
291 |
|
|
2.To add a record, click the New button. The Total field does not fill in until you click Find Next and Find Prev to enter this record. When you come back to the record, the total will be filled in.
Additional Details: The Criteria button will allow you to limit the Find Next and Find Prev buttons to only contain records. For instance, click Criteria, enter Joe as the Rep, and click Next. You will see only
Joe’s records.
Gotcha: The Form command used to be on the Excel 2003 Data menu. Microsoft has removed this option.
However, you can use the Excel 2003 access key Alt+D+O to load the data form. If you want to have an icon for Data Form, you can customize the Quick Access toolbar. In the Customize dialog, you look in the category Commands Not in the Ribbon.
CELL AUTOCOMPLETE STOPPED WORKING
Problem: I am typing data in column A. When I type the first few letters in a cell, Excel suggests the complete entry and I only have to press Enter. Suddenly, AutoComplete is not working for one customer.
Strategy: AutoComplete is cool.
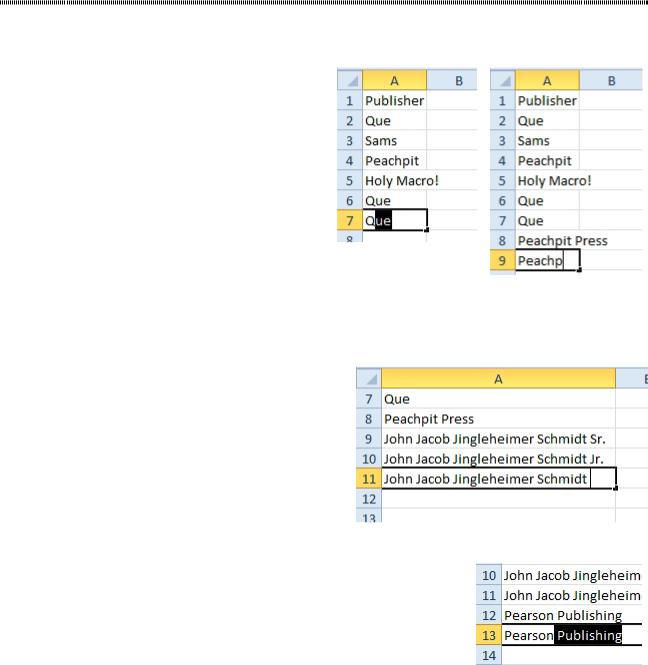
In Figure 746, you only need to type Q and Enter to fill the cell with Que.
But, in Figure 747, Excel won’t suggest an entry. Excel isn’t sure if you mean “Peachpit” or “Peach- pit Press”.
Figure 746 Excel suggests entries from |
|
3 |
the prior list. |
Figure 747 Excel stops |
|
|
|
|
|
using AutoComplete. |
|
AutoComplete won’t suggest until you type enough characters to make the entry unique. When you have two names that are identical until near the very end, AutoComplete will barely save you any typing.
Figure 748 AutoComplete will save you very little typing in this case.
Another AutoComplete frustration: Let’s say you’ve entered Pearson Publishing and now you want to enter just
Pearson. You will have to type Pearson, but if you press Enter, Excel will fill in Publishing.
Instead, press the delete key to erase the suggested charac- ters. You can then press Enter.
Figure 749 You can’t press Enter now.
292 |
POWER EXCEL WITH MR EXCEL |
|
|
The final AutoComplete frustration is when you have some blank cells in your data. AutoComplete will not be able to find an entry that appears above the blank cell.
There are two workarounds for this.
●● Before you start doing data entry, select the range where you will be entering data, perhaps A1:A100.
Type =”” and press Ctrl+Enter. The AutoComplete will work through the blank cells now.
●● Alternatively, insert a temporary column A that is non-blank. Fill A1:A100 with the number 1. You can now leave blanks in column B and AutoComplete will still work.
Figure 750 AutoComplete won’t offer values before the blank cell.
Figure 751 Non-blank cells in adjacent column prevent blank issue.
DATA CLEANSING WITH FLASH FILL IN EXCEL 2013
Problem: I need to join text or break apart text in Excel 2013.
Strategy: Use the new Flash Fill feature. Say that you have First Name in column A, Last Name in col- umn B. You want first initial, a period, and a last name in column C.
1. You must type a heading in C1 first or Flash Fill will not work. 2. Type the pattern in C2: M. Henderson.
3. Type the first letter in C3. As soon as you type J, Flash Fill will draw the proposed data in grey. 4. Press Enter to accept the flash fill.
Figure 752 Flash Fill will save people hours of needless typing.
Gotcha: Flash Fill provides a static solution. If column A later changes, column C won’t update.
FLASH FILL WAS THERE AND IS NOW GONE
Problem: I saw Flash Fill propose a solution, but I did not hit the correct key, and now it is all gone.
Strategy: Finish typing the second entry. Go to the blank cell below your first two entries. Press Ctrl+E or select Data, Flash Fill. The data will come back.

PART 3: WRANGLING DATA |
|
293 |
|
|
|
|
FLASH FILL WAS NOT PERFECT |
|
Problem: Some people in my data set do not have middle initials. Flash Fill is putting periods between the first and last name for those people.
Figure 753 Rose Mason is missing a middle initial, but Flash Fill still adds the period.
Strategy: After the initial Flash Fill, find a record and type the correction. Flash Fill will kick in again, correcting items that match the new pattern. Watch the Status Bar in the lower left to see how many re- cords were corrected.
3
Figure 754 Flash Fill watches for you to make the first correction.
After the correction, open the dropdown. You can select all of the newly changed cells. Use the Home tab to apply a fill color, so you can check the corrected cells.
FLASH FILL WON’T FILL NUMBERS
Problem: Flash Fill is not working with numbers. Actually, I see the grey numbers appear, but then Excel erases them.
Strategy: Chad Rothschiller at Microsoft points out there are too many coincidences that can happen in numbers. With only 10 digits, Chad might think he knows the pattern but then screw up your data. So,
Chad shows you the preview, but then withdraws it. It is up to you to go to the blank next blank cell and press Ctrl+E.
FLASH FILL AND DATES
Problem: Flash Fill won’t fill dates. When I use Ctrl+E, it won’t get them right.
Strategy: First, the Text to Columns command would handle dates better than Flash Fill. But, if you need to use Flash Fill, follow these steps:
1. Choose the column where you want the dates to fill.
2. You have to apply a date format that has two spaces for month and four for year. Press Ctrl+1 to dis- play the Format Cells dialog. On the Number tab, choose the Custom category. Type a date format of MM/DD/YYYY.
3. Fill in the first date.
4. Go to the blank cell below that date.
5. Ctrl+E to Flash Fill.
6. You are now free to select the column and apply another date format.