

522 |
POWER EXCEL WITH MR EXCEL |
|
|
instead of starting in the left corner, you start directly in the middle of the circle. As you drag outward, the circle will grow.
The other modifying key is the Alt key. A rectangle drawn with the Alt key held down will snap to the cell borders. The rectangle can either be two columns wide or three columns wide, but not 2.5 columns wide when you use the Alt key.
If you want to resize a square, hold down the Shift key |
|
while you drag a corner handle. This will force Excel to |
|
keep the aspect ratio the same. |
Figure 1357 Use Alt & edges align with cell. |
|
Additional Details: If you need to produce many identically sized squares, Ctrl+drag the first square to make an identical copy. You can then Ctrl+click both squares and Ctrl+drag to create four squares.
ADD TEXT TO ANY CLOSED SHAPE
Problem: How can I add fixed text to a shape?
Strategy: All closed shapes can hold text. To add text to a shape, you simply right-click the shape and choose Edit Text.
Excel will add a flashing insertion cursor inside the shape. You type your text, pressing Enter when you want to start a new line.
Additional Details: To format the text, you select the characters with the mouse and then move the mouse up and to the right to display the Mini tool- bar. You can use the formatting icons on the Mini toolbar to change the font.
Figure 1358 Select text. Move up and to the right for the Mini toolbar.
PLACE CELL CONTENTS IN A SHAPE
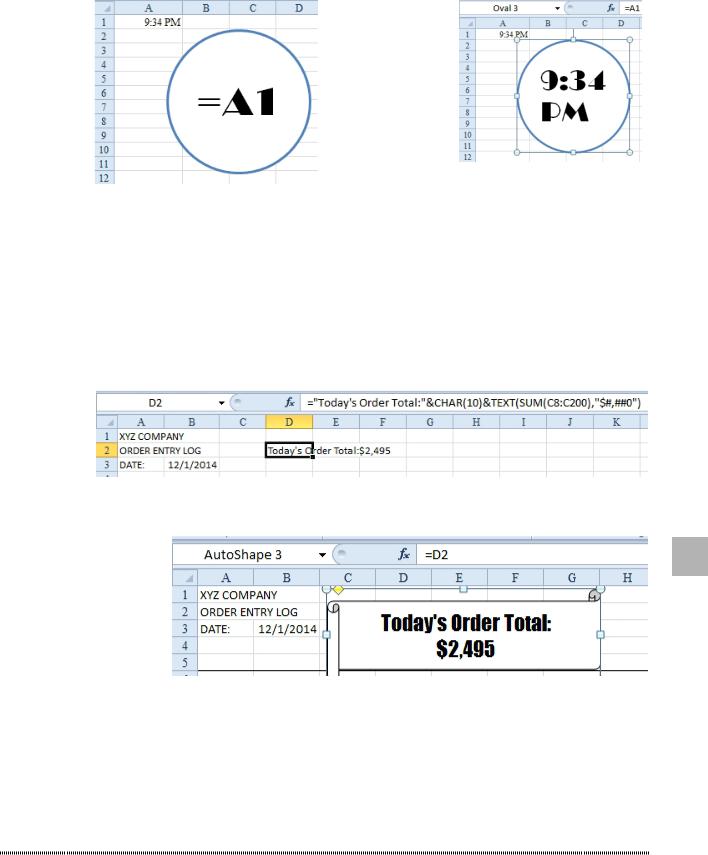
Problem: I don’t want to use just static text in a shape; I want to display the results of a calculation in the shape.
Strategy: This is possible, although typing the formula in the shape is not the way to do it. Here’s how you do it:
1. Select the shape.
2. Click in the formula bar and type =A1. When you press Enter, the value from A1 will appear in the shape.

524 |
POWER EXCEL WITH MR EXCEL |
|
|
Strategy: When you select a shape, a green circle appears. Grab the green circle, click, and rotate the shape. This is a free rotation; you can rotate the shape in 360 degrees.
Additional Details: If you need to rotate exactly 90, 180, or 270 degrees, you can use the Rotate dropdown in the Arrange group of the Format tab.
Figure 1363 Drag green handle to rotate.
Most shapes have yellow inflection points. This shape has two such inflection points. Dragging an inflection point will change the size of one portion of a shape.
|
Figure 1364 Drag the right-side diamond |
|
up. |
For even more flexibility, right-click the shape and choose |
|
Edit Points. You now have a black handle at each corner |
|
of the shape. You can drag any handle in any direction to |
|
change the shape. |
|
Gotcha: Dragging a point will remove the yellow inflection |
|
handles from the shape. |
|
Using these tools, you can morph any of the 175 shapes into |
|
thousands of variations. |
Figure 1365 Drag one corner of the shape. |
CREATE DOZENS OF LIGHTNING BOLTS
Problem: I need to create multiple shapes. In the old Excel, I could double-click a shape icon and then draw multiple copies of the shape without going back to the menu. Now, I can’t seem to double-click the lightning bolt in the Shapes menu.
Strategy: Microsoft came up with a solution to this problem, although it is as subtle as the double-click trick in the old Excel.
It helps to draw one shape first, format it, and then right-click and select Set as Default Shape. This will ensure that the new shapes have the same color as this shape. Follow these steps:
1. Select Insert, Shapes dropdown.
2. Right-click any shape and choose Lock Drawing Mode. The mouse pointer changes to a thin plus sign.
Figure 1366 Find a shape, right-click, and select Lock Drawing Mode.
3. To draw a default size shape, click the mouse pointer anywhere on the worksheet. To draw a shape of a different size, click and drag to draw the shape.
4. When you are done drawing shapes, press the Esc key or select another worksheet to exit Drawing mode.
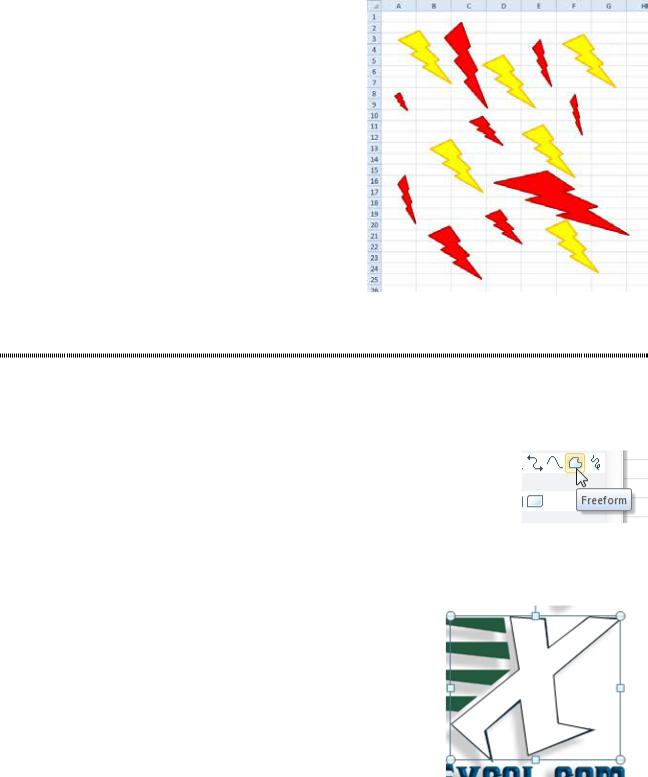
The lighter drawings shown below are default drawings created with a single click in the upper corner of the shape. The darker drawings required a click and drag to size.
PART 4: MAKING THINGS LOOK GOOD |
525 |
|
|
Figure 1367 Shazam!
MAKE A LOGO INTO A SHAPE
Problem: I’m looking for a fun way to kill some time while the Internet is down. Can I make my logo into a Shape that can be formatted using the Drawing Tools?
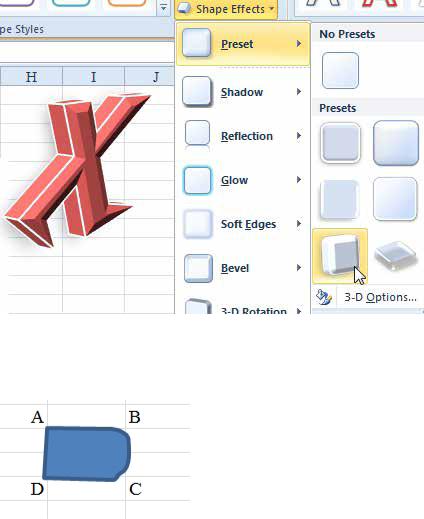
Strategy: You can paste your company’s logo or any other logo to a worksheet. Then you select Insert, Shapes dropdown, Lines, Freeform.
Figure 1368 Freeform can create straight or curved lines or shapes. |
|
|
Trace the logo. It is easy to draw straight lines: You start at one corner of the logo, click the corner, and |
4 |
|
then click on the next corner. |
|
|
|
|
|
If you need to follow a curved path for part of the |
|
|
logo, you should increase the zoom to 200% or more. |
|
|
You can use the Freeform tool to create a line or |
|
|
a closed shape. To finish a line type drawing, you |
|
|
double-click on the last point. To finish a closed |
|
|
shape, you continue clicking at each corner. When |
|
|
you get back to the original corner of the logo, you |
|
|
click again, and the shape will appear. |
|
|
Results: You will have a custom shape of your logo |
|
|
that you can move, resize, rotate, or format to your |
Figure 1369 Click the starting point again to fin- |
|
heart’s content. Here is the MrExcel logo with a |
|
|
3-D format applied. |
ish a shape. |
|
526 |
POWER EXCEL WITH MR EXCEL |
|
|
Figure 1370 Apply formatting to the shape.
Additional Details: To draw a curved line, you can either click frequently along the curve, basically creating a curve from a series of tiny short-line segments, or you can press the left mouse button while you carefully trace the curve. This is a little tricky. To draw the shape below, follow these steps:
Figure 1371 Draw three straight lines and a curve.
1. Click once at point A.
2. Click once at point B. This finishes the straight line along the top.
3. While still at point B, click again and start to trace the curve. Holding down the mouse button while drawing makes the Freeform tool act like the Scribble tool for this segment of the shape. Notice that there must be two separate clicks at point B. If you start drawing the curve without a second click, Excel will add a random curve to the end of the AB line segment.
4. When you arrive at the end of the curve, point C, release the mouse button. 5. Move the mouse to point D and click to draw the bottom edge.
6. Move the mouse to point A and click again to close the shape.
Gotcha: It is easy to make a mistake while drawing. To fine-tune the shape, right-click the shape and choose Edit Points. In Edit Points mode, you can right-click any segment and change the shape from curved to straight, add an end point, or close an unclosed shape.
Alternate Strategy: To draw a logo that’s not angular, you can use the Scribble tool. You find it by select- ing Insert, Shapes dropdown.
To use this tool, you click and hold the mouse button to start to draw. The mouse changes to a pencil. As long as you hold the mouse down, you will be drawing the shape.
As with the Freeform tool, you can create either a line or a closed shape. To close the shape, you release the mouse button when your drawing line has rejoined the start point.
Excel will create a closed shape from your scribble. You can apply color or effects using the Drawing Tools ribbon tab.